IKEA BESTA 3D printer cabinet
How to build a convenient and spacious 3D printer cabinet/enclosure using common IKEA shelves.
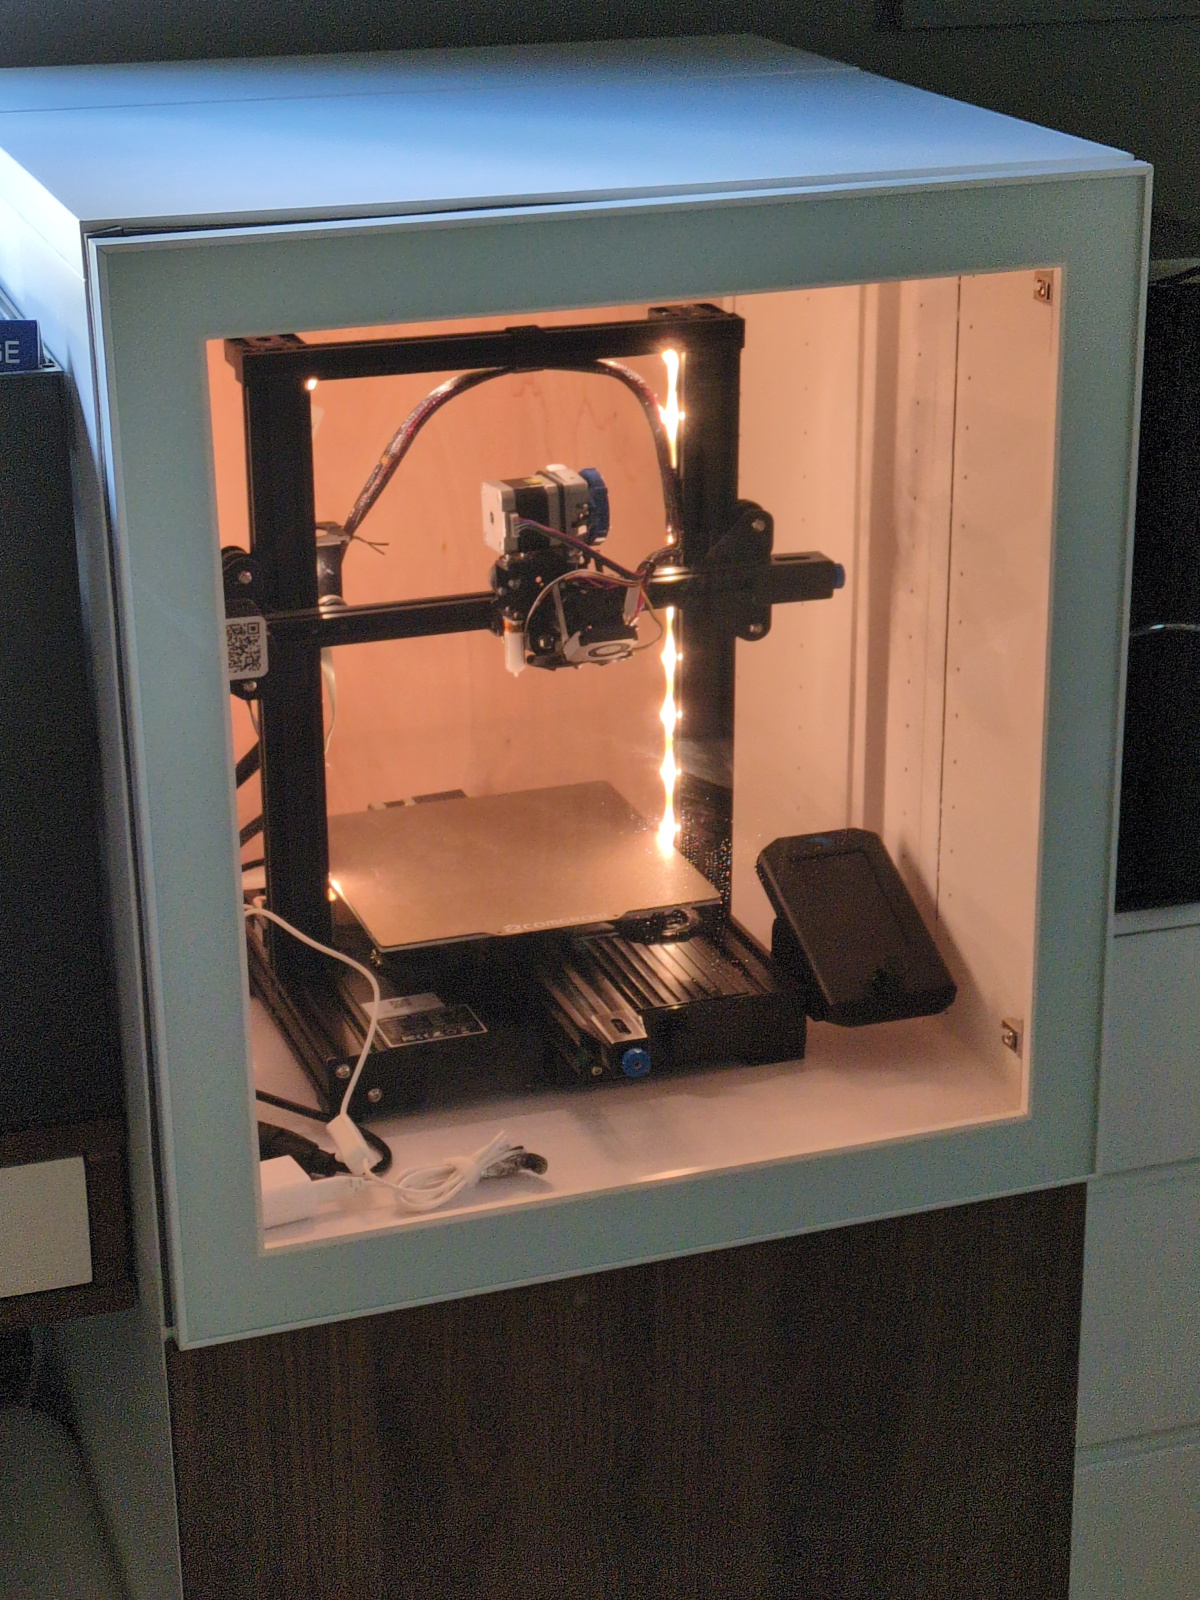
Idea
I wanted a nice enclosure for my 3D printer, to shield the printer from drafts (especially when printing ABS), and to shield myself from fumes and noise.
For my older and smaller RepRap printer, I bought and used an upside-down storage bin. But it is not tall enough for Ender3 V2, and unwieldy in general.
I tried building an enclosure from LACK tables, plywood, and plexiglass, but it was not turning out very well, and I never finished it.
Then I saw this Fediverse post.
IKEA's BESTA cabinets are a good size for an Ender, but need a bit more depth. Combining a deeper and a shallower cabinets should produce a cube approximately 60cm (23.5in) on the side, enough for an Ender, some peripherals, and potentially other printers in the future.
Materials
Listed materials are for building a single enclosure. I built mine as a two-tier cabinet, so I got two of each frames and another door for the bottom section.
There are many options and things that I should have done better - see the steps below.
- BESTA cabinet frame - 40 cm (15 3/4 inches) deep
- BESTA cabinet frame - 20 cm (7 7/8 inches) deep
- BESTA cabinet door - GLASSVIK (if getting a different door, make sure it fits BESTA)
- Steel angles (the longer the better) or corner braces
- Longer screws - 4+ cm (1 1/2+ in), long enough to go through top and bottom panels
- Shorter screws - ~2 cm (~1 in), long enough to attach angles and/or plywood
- Silicone caulk
- (Optional) Roll of stick-on insulation strip
- (Optional) glue
- (Optional) 2ft x 2ft plywood sheet (2ft x 4ft plywood sheet for two-tier cabinet)
Links
BESTA cabinet frame - 40 cm (15 3/4 inches) deep
BESTA cabinet frame - 20 cm (7 7/8 inches) deep
Process
Walls
To combine the deep and the shallow cabinets, I staggered their bottom and side panels.
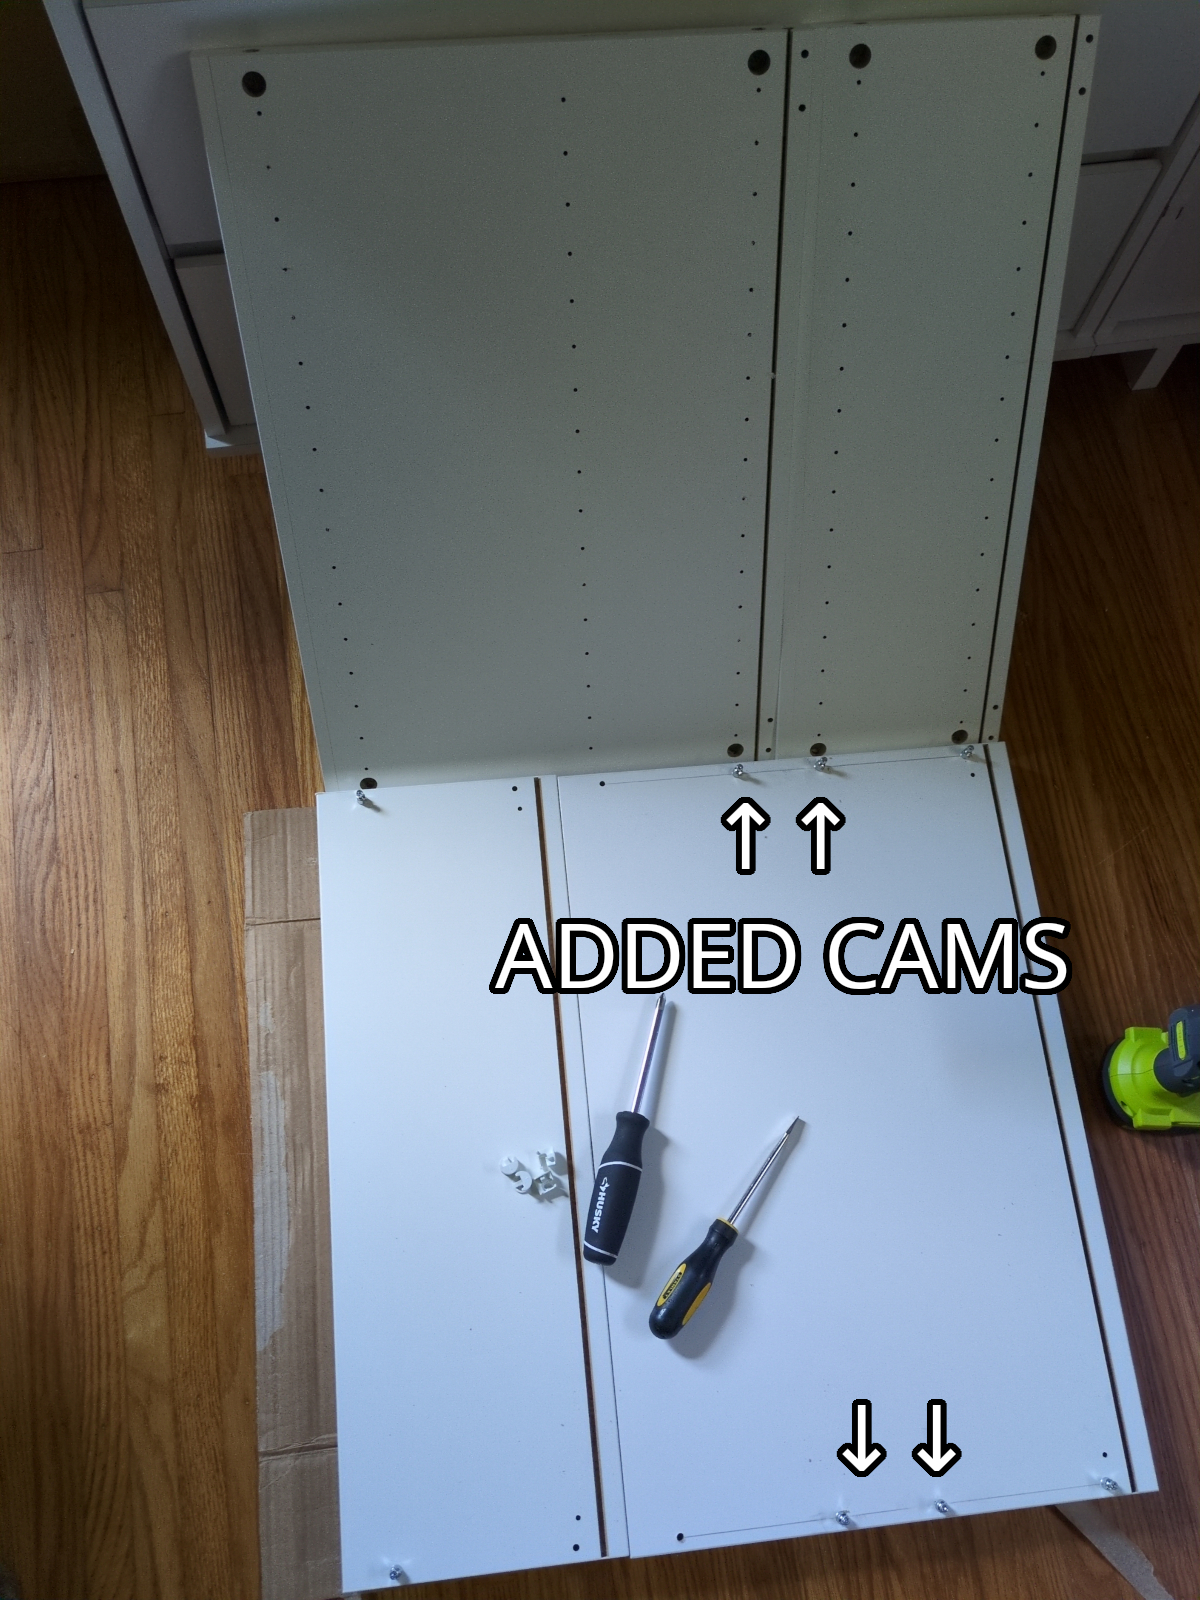
It helps to use clamps to hold the bottom panels together and aligned. It might be a good idea to glue the bottom panels together (as long as they still form a flat surface, of course).
To attach the walls, I carefully measured distances between the cam holes, drilled new holes into the bottom panels, screwed in the cams, and attached the walls using cam bolts.
Note: There WILL be a gap between the wall panels. Wall panels are not as long/deep as the bottom panels.
Thinking back, it's not the best idea. Bottom panel is very thin outside of the pre-drilled holes, and cams don't hold too well. Also, it is easy to be off by a millimeter and misalign the wall panels.
Instead of adding 2 more cams, I think it would have been easier and better to:
- Stagger and attach wall panels using existing 2 cams on each wall
- Align the wall and the bottom panels
- Attach the wall panel(s) to the bottom panel(s) using angle(s). If you have a long enough angle, you would be able to easily align and attach all four panels together.
Same idea goes for the other wall panels and the top panel.
Back
Instructions say to insert a thin piece of pressboard into the groove on the wall and bottom panels before attaching the top panel. It might be fine if you are building a single enclosure, but for me, such back wall did not provide enough rigidity, and the entire cabinet sheared sideways (i.e. top panel moved left and right way too easily, and might not support the weight above very well).
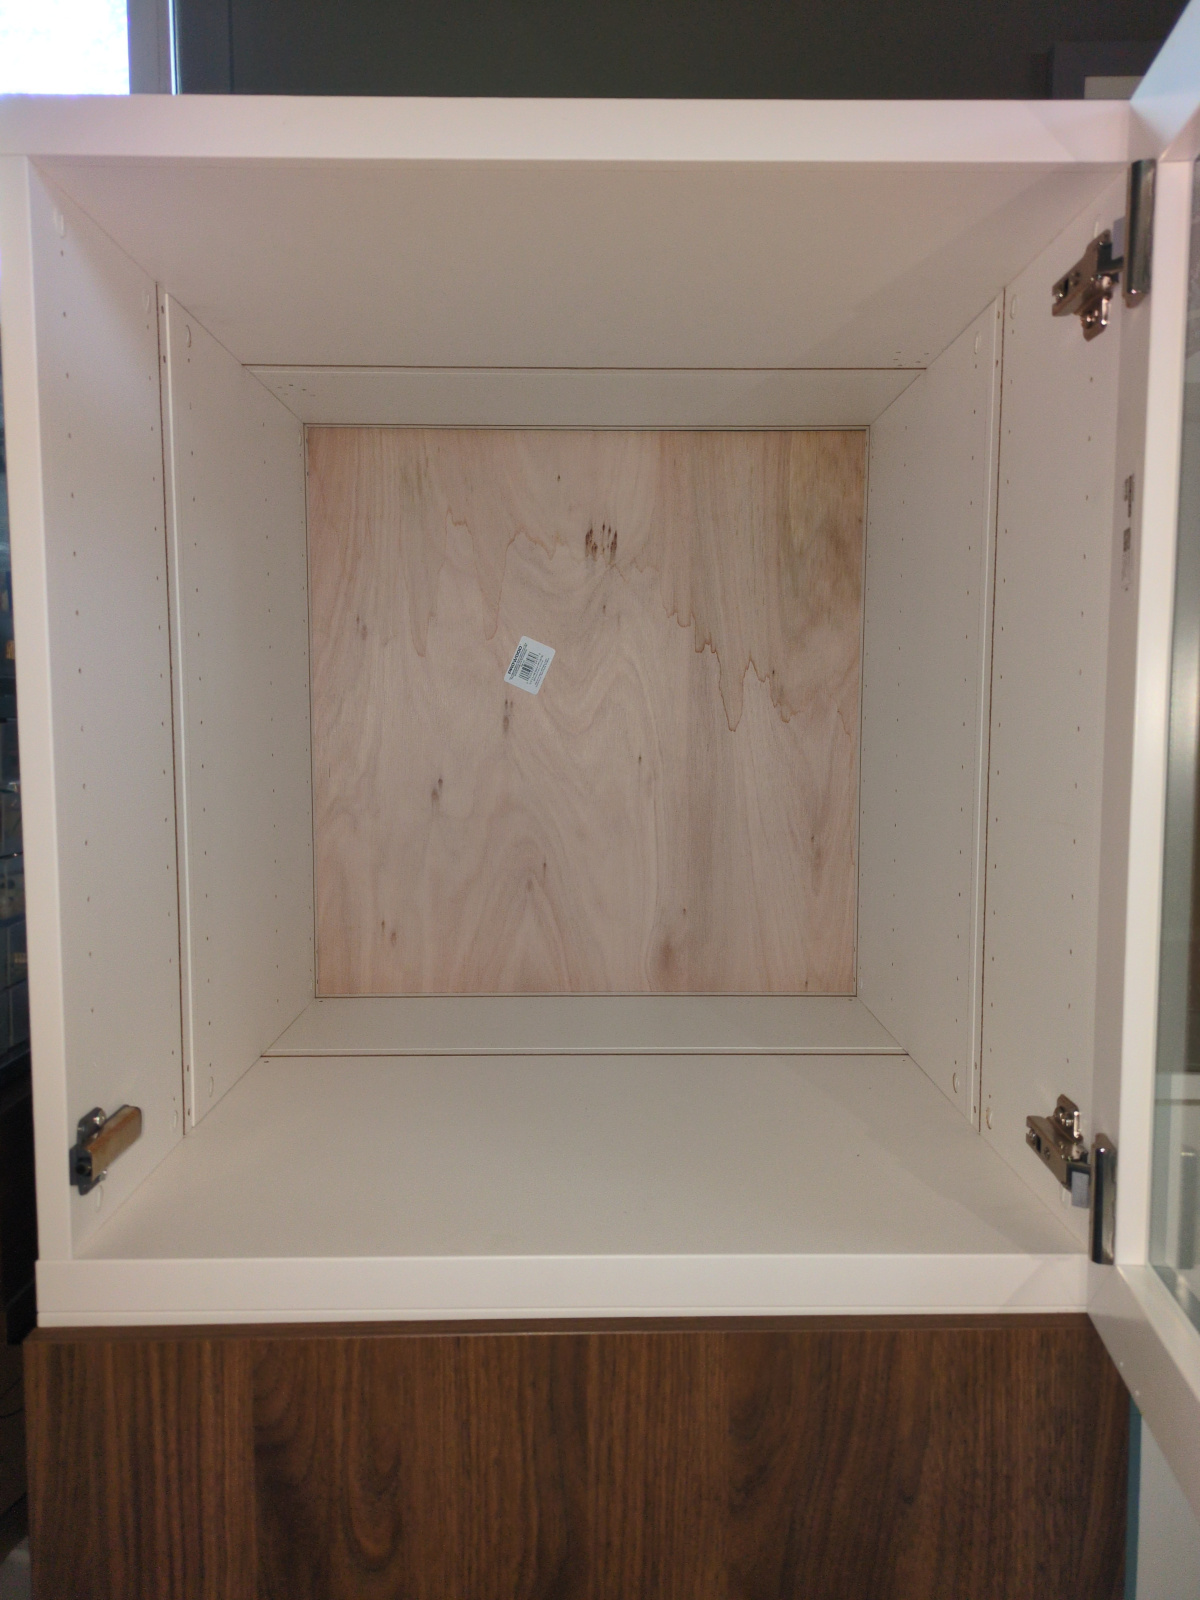
So I did not use the provided pressboard. After I built both cabinets, I laid them face down and attached a 2x4 sheet of plywood to their backs. It is almost the perfect size and prevents wobbling and shearing.
You MIGHT be able to avoid the 2x4 if you use corner braces or other hardware to keep the walls upright, or the angles from the previous step are very rigid.
Two tiers
The official instruction say to use a bracket and double-sided tape (!) to attach the top cabinet to the bottom one. Cool, but I wanted something more reliable, so I drilled a few holes through the top panel of the bottom cabinet, and attached it using long screws to the bottom of the top cabinet. It's not visible and holds well.
Another option I thought of is to find long bolts that fit the threads of the feet inserts, and use those. Would require some careful measurements and drilling
Insulation
Since there was a gap between the deeper and shallower side wall panels, and a gap between side walls and the back wall, I had to caulk all of them.
For the gap between the door and the cabinet, I used a roll of a stick-on strip door insulation. However,
Power
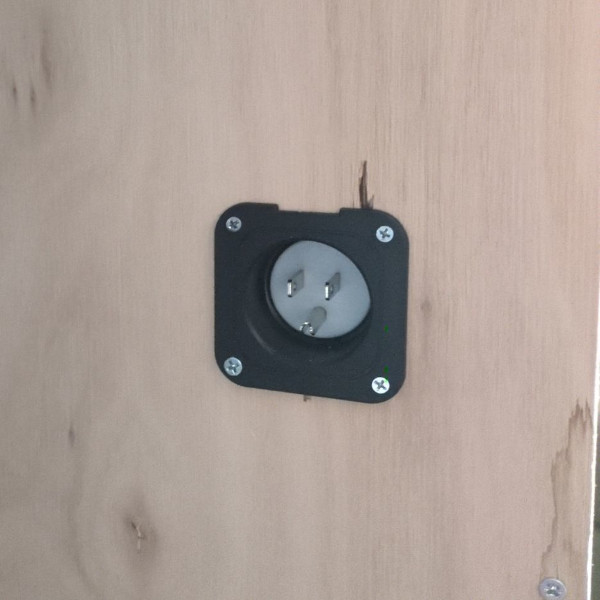
I used a through-wall inlet plug, which can be easily connected by a single-connection extension cord.
Encountered issues
Since I did not originally use angles, and the cams don't hold too well on thin veneer, when moving the cabinet around, side wall and top/bottom panels would sometimes misalign, looking like the front of the cabinet has shifted left or right relative to the back. I ended up adding some small brackets/angles to the top and side panels in the top and the bottom cabinets.
Result
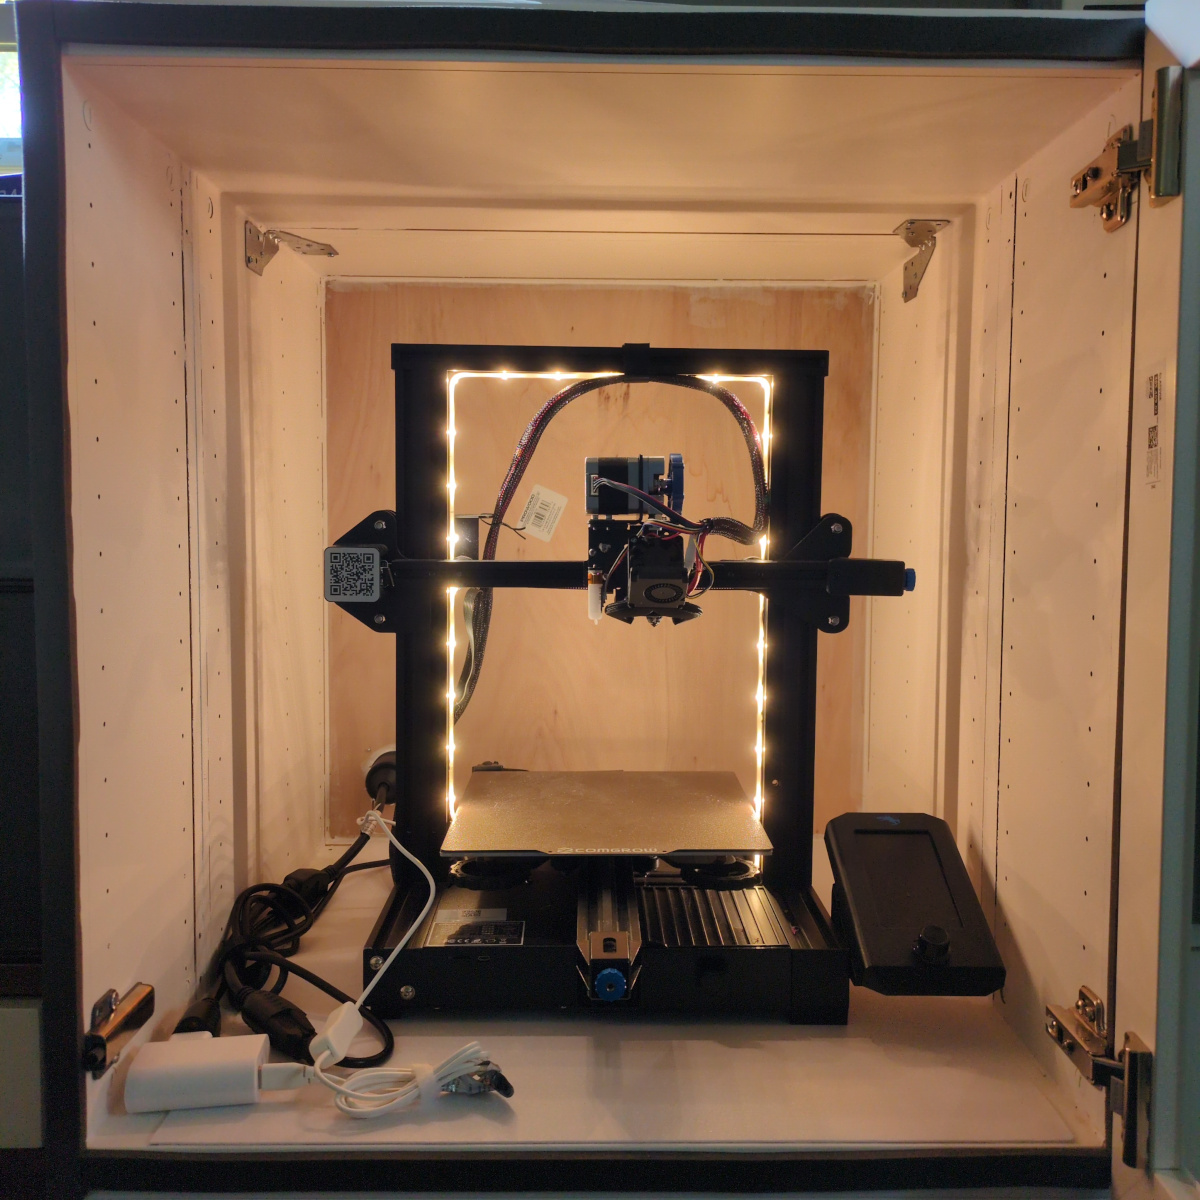
Reinforced, caulked, insulated, powered, and lit. Just needs an exhaust.